 Flaz
FlazHow to Install WordPress on Flaz Cloud

Want to create a website but tired of manually uploading files? Follow this one-click WordPress installation guide using Softaculous on Flaz Cloud to get your website online quickly.
Building a website no longer needs to be complicated with manual file uploads or creating databases one by one. With the help of the Softaculous feature on Flaz Cloud, you can have a ready-to-use WordPress website in less than a minute.
This method is perfect for those who want to save time and focus directly on filling website content. Let's discuss step by step how to install WordPress with this one-click feature so your website goes live on the internet.
Open WordPress Manager Menu
First, please log in to your cPanel account. If you forget how, you can review the guide How to Login to cPanel Flaz Cloud to access the main page.
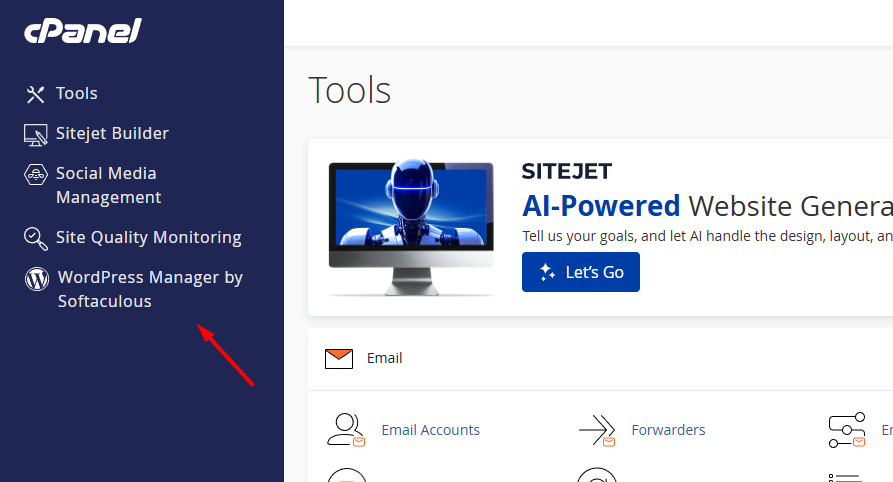
Once inside cPanel, look at the menu list on the left side of your screen. Find and click the menu named WordPress Manager by Softaculous.
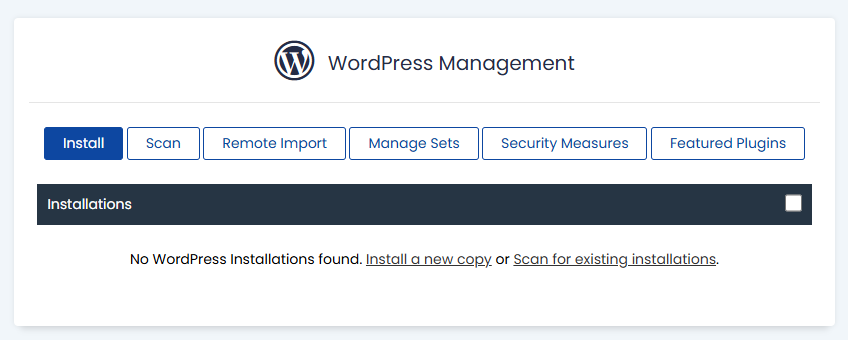
On this page you will see a list of WordPress websites that have been created. If this is your first website, the display will be empty and you can directly press the blue Install button.
Set Website Name and Admin Account
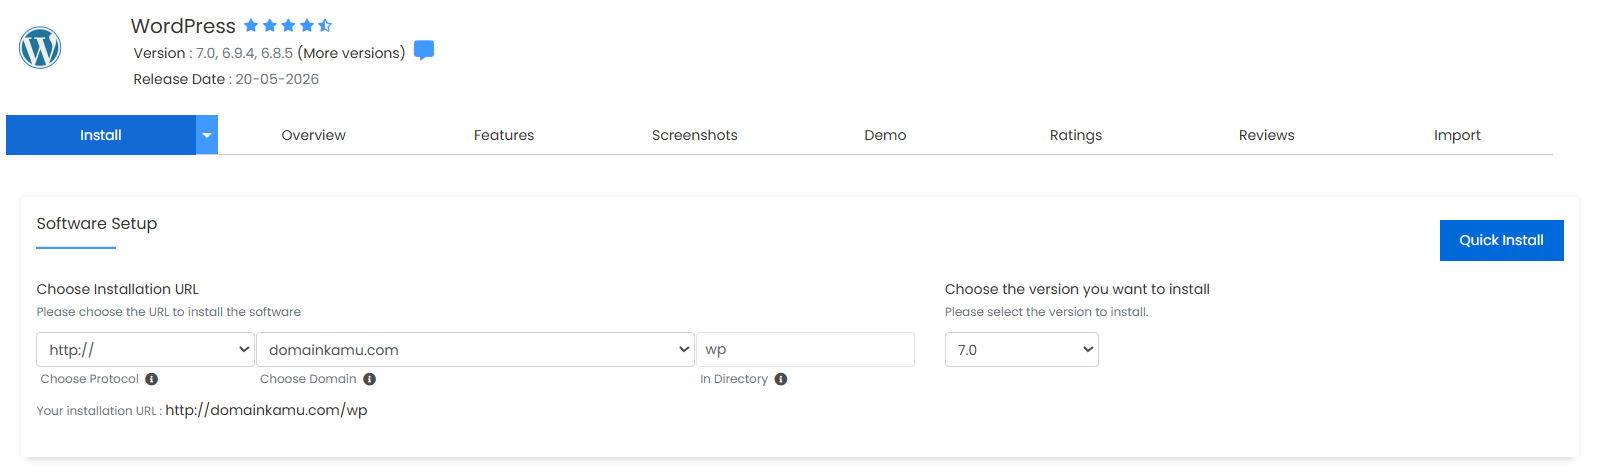
On the installation page, you will be asked to fill in some basic information. Make sure in the Choose Protocol section you select https:// so your website has a security lock. Select your domain name in the available field.
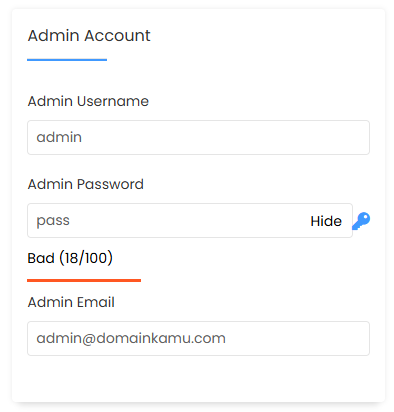
Next, fill in the website name and a brief description. The most important part you must not forget is the Admin Account. Create a strong username and password. This password is what you will use later to log in to your website editing page. Make sure your account is fully ready by following How to Register a Flaz Cloud Account before continuing.
Useful Advanced Settings
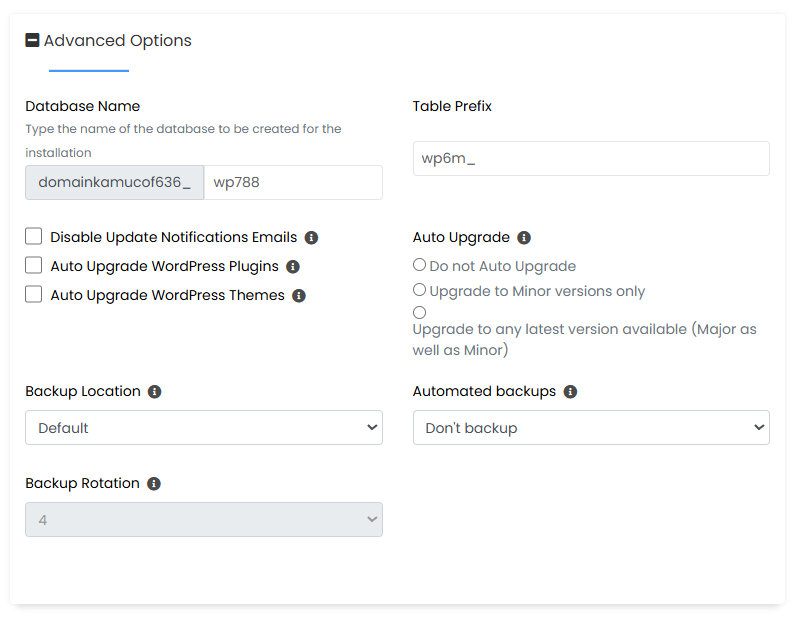
If you want more organized settings, you can open the Advanced Options section. Here you can see the database name that will be created automatically by the system. You can also set the Table Prefix to be more unique for security.
Some very helpful additional features are Auto Upgrade. We recommend you choose the option to automatically update plugins and themes so your website always uses the latest and more secure version. You can also set Backup Rotation to determine how many backup files you want to keep in your hosting.
Run WordPress Installation
If all data has been filled in correctly, now scroll down to the bottom section. You will find the Install button. Before clicking the button, you can enter your email address in the bottom field so installation details are sent to your inbox.
Click the Install button and wait for the process to run. Usually the progress indicator only takes a few seconds to reach one hundred percent. Once complete, a success message will appear along with your website address link and a special link to access the WordPress admin page.
Check the Results Immediately
Now you can try opening your website address in a browser. If the standard WordPress display appears, the installation has been successful. Don't forget to immediately Verify Your Flaz Cloud Account Email so you don't miss important information about your hosting resource usage.
If an error message appears during the installation process, it usually happens because there are old files left in your website folder. You can delete the old files first through the cPanel File Manager or check the overwrite option if available in Softaculous. Now your website is ready to be designed according to your wishes.
Was this article helpful?