 Flaz
FlazHow to Create a MySQL Database in cPanel

Need a place to store your website data? Learn how to easily create a MySQL database through the Wizard feature in cPanel Flaz Cloud in just a few simple steps.
Every website that requires a login system or data storage such as WordPress articles definitely needs a database. In cPanel Flaz Cloud, you can create this data storage with very easy and organized steps.
We recommend you use the Wizard feature to ensure no steps are missed, from naming to setting user access rights. Follow the practical guide below so your database is ready to use.
1. Access the Database Wizard
First, please log in to your cPanel account. If you don't know how, you can see How to Login to cPanel Flaz Cloud as the first step.
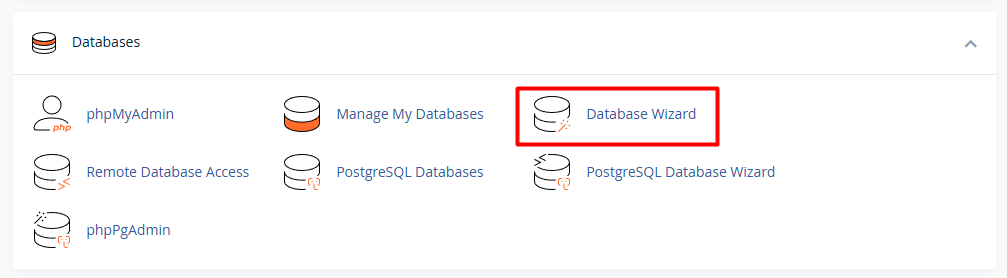
Once on the cPanel main page, find the Databases category and click the MySQL Database Wizard menu. This feature will guide you through four stages of database creation in a very simple way. If you're a new user, make sure your account is ready by checking How to Register a Flaz Cloud Account so you can access all hosting features.
2. Name Your Database
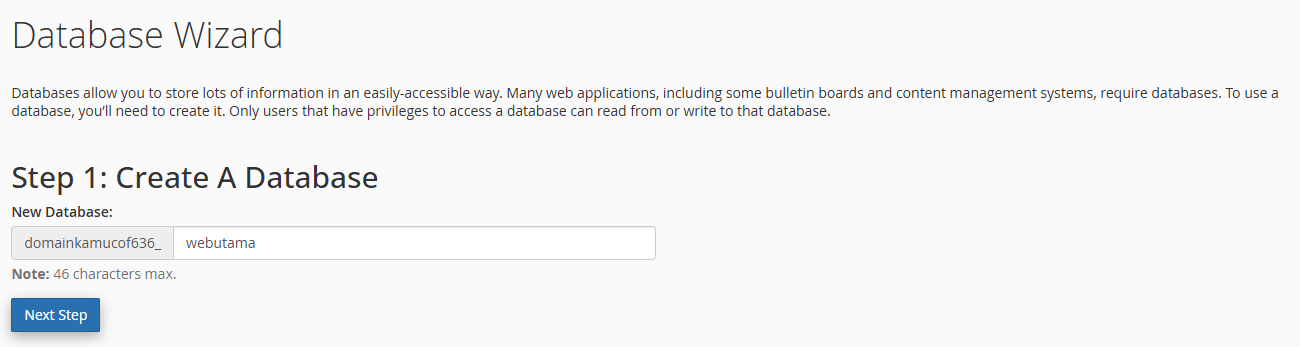
The first stage is to give a name to your new database. In front of the input field, you will see a short name (prefix) that is automatically filled in by the system. Simply add the name you want in the empty field.
For example, if your prefix name is userflaz_, you can add the word webutama after it. So your full database name will be userflaz_webutama. After that, click the Next Step button. Also make sure your email is correct by following How to Verify Your Flaz Cloud Account Email so hosting status reports are always secure.
3. Create a Database User
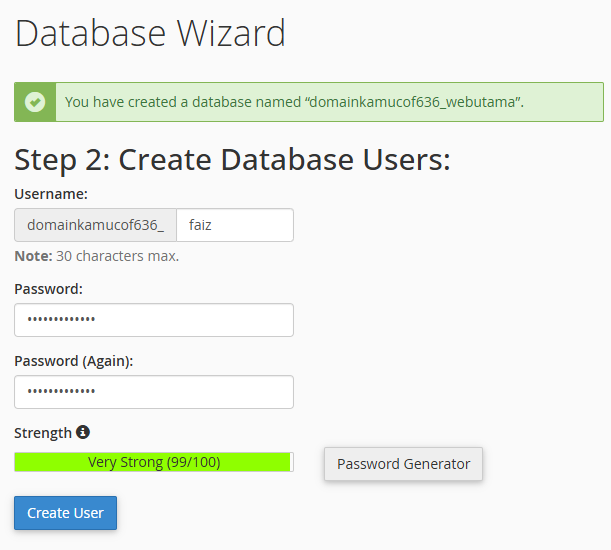
A database cannot work without a user who has login credentials. In this second stage, you are asked to create a username and password.
-
Username: Enter your chosen short name. Like the database name, the system will add a prefix in front of it.
-
Password: Create a strong password. We recommend you use the Password Generator button to get a hard-to-guess combination.
-
Confirm Password: Re-enter the password to ensure there are no typos.
It is very important for you to copy and save this database name, username, and password to your personal notes. This data is what you will later enter into your website settings such as in the wp-config.php file of WordPress.
4. Set Access Rights (Privileges)
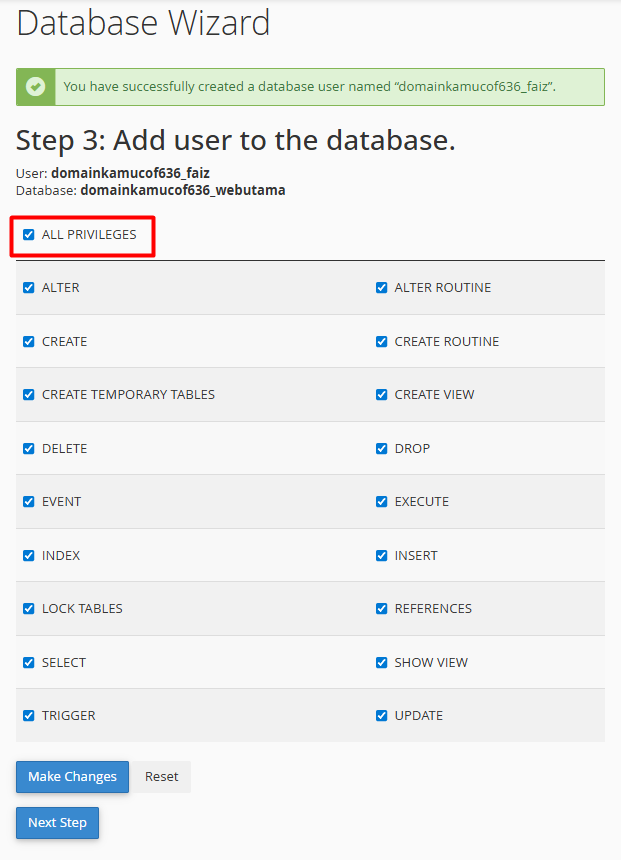
After clicking the create user button, you will be taken to the third stage, which is setting access rights. Here you determine what the user is allowed to do with the database you created.
For your website to run smoothly without permission issues, please check the ALL PRIVILEGES option. By checking this, the user has full rights to write, read, and delete data in the database. After that, click the Next Step button to complete the entire process.
5. Database Ready to Use
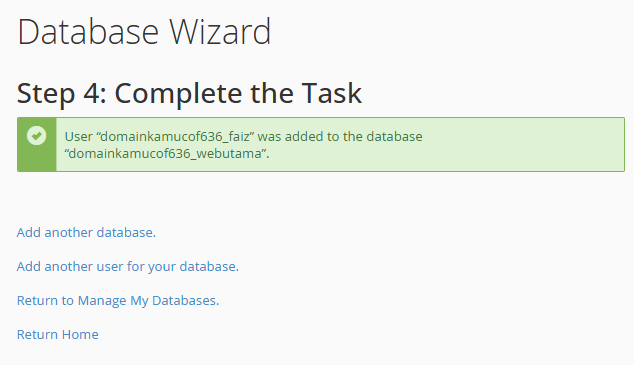
A success message will appear indicating that the database and user have been successfully linked. Now you can use this data to continue the installation process of your website or application.
If in the future you want to see a list of databases you've created, you can open the MySQL Databases menu on the cPanel main page. There you can change the user password or delete databases that are no longer in use. If you encounter difficulties when trying to connect the database to your website, make sure the database name and username are correctly written including the prefix provided by the system.
Was this article helpful?